Revamp Your Kitchen Cabinets with Low-Cost Paint and Hardware Upgrades
Are you tired of looking at the same old, outdated kitchen cabinets day in and day out? Do you wish you could transform their appearance without breaking the bank? If so, you're in luck! In this comprehensive guide, we'll show you how to master the art of kitchen cabinet transformation using affordable paint and stylish hardware. Get ready to breathe new life into your kitchen on a budget, boosting your home's value and appeal in the process.
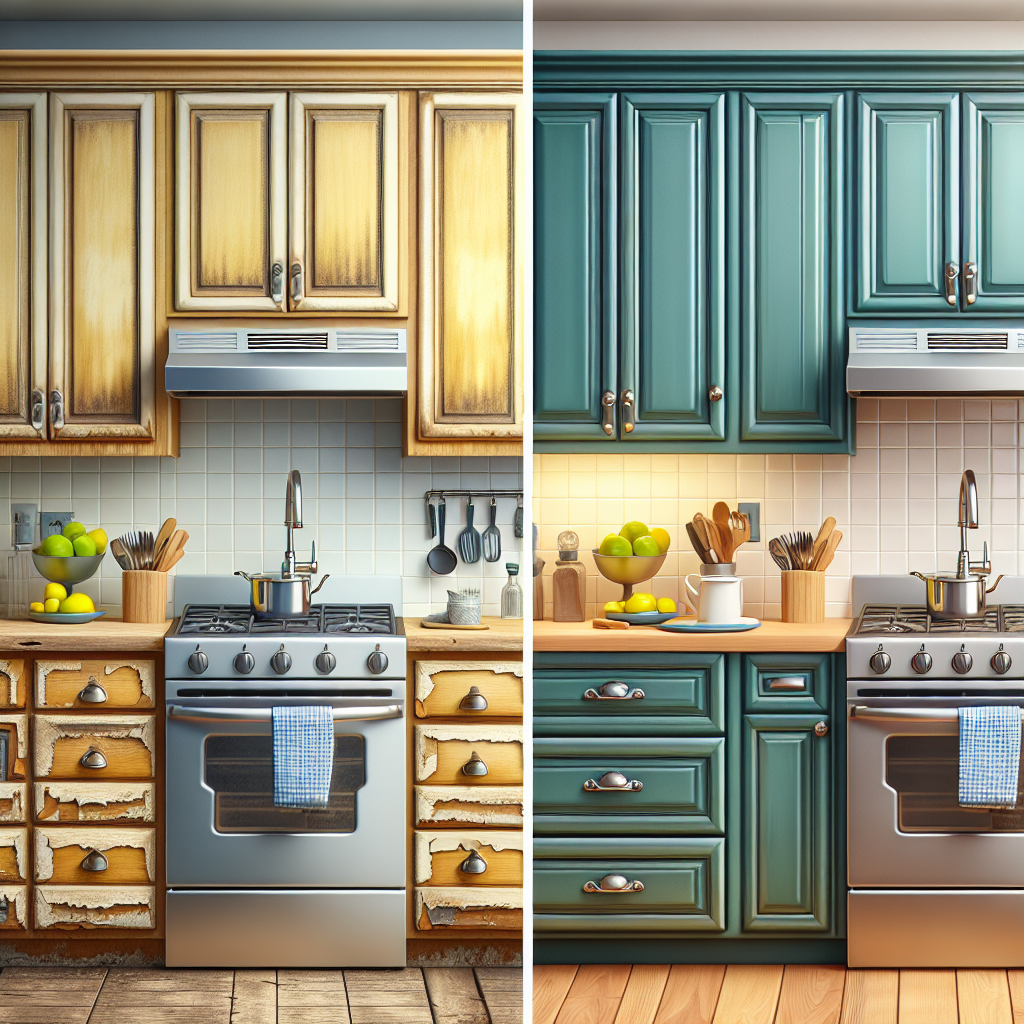
Understanding the Power of Cabinet Makeovers
Your kitchen cabinets are the backbone of your culinary space, and their appearance can make a significant impact on the overall look and feel of the room. Whether your cabinets are showing their age, stuck in a dated style, or simply not aligning with your design preferences, a well-executed cabinet makeover can work wonders. Not only can it dramatically improve the aesthetic, but it can also increase the functionality and perceived value of your kitchen.
By focusing on low-cost solutions like paint and hardware upgrades, you can achieve a high-end, custom-like look without the hefty price tag. This approach allows you to cater to your personal style and preferences while staying within a reasonable budget, making it an attractive option for homeowners and DIY enthusiasts alike.
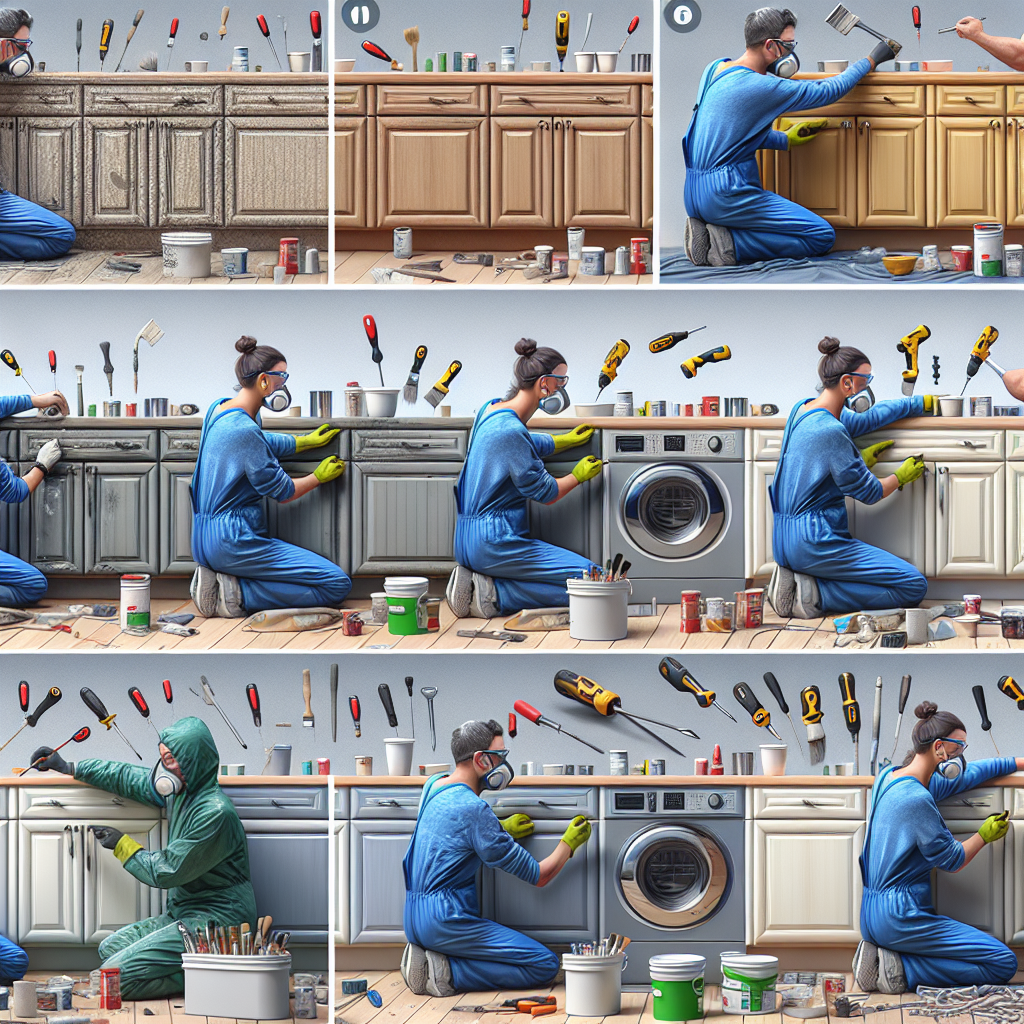
Preparing Your Cabinets for Transformation
Before you dive into the exciting part of choosing colors and hardware, it's essential to properly prepare your cabinets for the transformation. This step-by-step process will ensure a smooth and long-lasting finish:
1. Clean and Degrease the Surfaces
- Remove all doors, drawers, and hardware from the cabinets.
- Use a degreasing cleaner or a mixture of warm water and dish soap to thoroughly clean the cabinet surfaces, removing any built-up grime, grease, or residue.
- Rinse the surfaces with clean water and allow them to dry completely.
2. Sand and Smooth the Surfaces
- Lightly sand the cabinet boxes, doors, and drawers using fine-grit sandpaper (220 grit or higher) to create a smooth, even surface for the paint to adhere to.
- Wipe away any dust or debris with a clean, dry cloth.
- For a flawless finish, consider using a wood filler to address any imperfections or holes, and sand the filled areas once dry.
3. Apply a Primer
- Choose a high-quality, paint-compatible primer that is suitable for the material of your cabinets (e.g., oil-based primer for wood, latex primer for laminate).
- Apply the primer in thin, even coats, allowing it to dry completely between applications as per the manufacturer's instructions.
- Lightly sand the primed surfaces with fine-grit sandpaper to create a smooth base for the paint.
Choosing the Perfect Paint and Finishes
With your cabinets properly prepared, it's time to start thinking about the fun part: selecting the right paint and finishes to transform your kitchen. Here are some key considerations:
1. Paint Selection
When it comes to cabinet paint, you have several options to choose from, each with its own advantages:
- Latex Paint: A popular choice for its easy application, quick drying time, and wide range of color options. Latex paint is also relatively affordable and easy to clean up.
- Oil-Based Paint: Provides a durable, glossy finish that is resistant to scratches and chipping. However, oil-based paints can be more challenging to work with and have a stronger odor.
- Chalk Paint: Offers a unique, matte finish with a vintage or distressed appearance. Chalk paint adheres well to surfaces without extensive prep work, making it a convenient choice.
- Cabinet-Specific Paint: Some paint manufacturers offer specialized cabinet paints that are designed to withstand the demands of kitchen cabinetry, such as higher moisture and frequent use. These paints often provide enhanced durability and a smooth, professional-looking finish.
Consider factors like the current condition of your cabinets, your desired aesthetic, and your personal painting experience when selecting the right paint for your project. 2. Finish Sheens
- Matte or Flat: Provides a soft, low-reflective finish that can help hide imperfections but may be more susceptible to wear and tear.
- Eggshell: Offers a subtle sheen that is slightly more durable than matte, making it a popular choice for kitchen cabinets.
- Satin: Delivers a smooth, velvety finish with a moderate amount of shine, which can be easier to clean than matte or eggshell.
- Semi-Gloss: Provides a high-sheen, reflective finish that is highly durable and easy to wipe clean, making it a great choice for high-use areas.
Consider the overall aesthetic you're aiming for, as well as the level of maintenance you're willing to commit to when selecting the appropriate finish sheen. Painting Your Cabinets Like a Pro Now that you've chosen your paint and finishes, it's time to put your painting skills to the test. Follow these step-by-step instructions for a professional-looking result: 1. Apply the Paint
- Begin by painting the cabinet boxes, working in small sections and using a high-quality brush or foam roller to achieve a smooth, even coverage.
- Once the cabinet boxes are complete, move on to the doors and drawers, painting the fronts, sides, and edges.
- Apply at least two to three thin, even coats of paint, allowing the proper drying time between each coat as per the manufacturer's recommendations.
- For a flawless finish, lightly sand the surfaces with fine-grit sandpaper between coats to ensure a smooth transition.
2. Reinstall the Hardware
- After the final coat of paint has dried, it's time to reinstall the cabinet hardware.
- If you're upgrading your hardware, carefully measure and mark the new hole placements to ensure a seamless installation.
- Use a screwdriver or power drill to secure the new hardware in place, taking care to align it properly.
3. Touch Up and Protect
- Inspect your work and address any minor imperfections or missed spots with touch-up paint.
- Consider applying a clear, protective topcoat, such as a polyurethane or cabinet-specific sealant, to help protect the paint from scratches, wear, and tear.
- Allow the topcoat to dry completely before reinstalling the cabinet doors and drawers.
Upgrading Your Hardware for Maximum Impact
While a fresh coat of paint can dramatically transform the appearance of your cabinets, adding new hardware can take your kitchen makeover to the next level. Here are some tips for selecting the perfect hardware:
1. Choose a Complementary Style
Consider the overall design aesthetic of your kitchen and select hardware that complements the style. From sleek and modern to rustic and farmhouse, there's a wide range of hardware options to choose from.
2. Opt for Quality and Durability
Invest in high-quality hardware that can withstand the demands of a busy kitchen. Look for options made from durable materials like stainless steel, brass, or brushed nickel, which offer both style and functionality.
3. Coordinate with Other Finishes
Ensure that your new hardware coordinates seamlessly with other finishes in your kitchen, such as your faucet, lighting, or appliances. Matching or complementary finishes will create a cohesive and visually appealing design.
 4. Consider Practical Factors
Don't forget to think about the practical aspects of your hardware, such as the size, shape, and placement. Ensure that the hardware is easy to grasp and complements the scale of your cabinets.
Budgeting for Your Cabinet Transformation
One of the biggest advantages of a cabinet makeover using paint and hardware is the cost-effective nature of the project. While the exact budget will depend on the size of your kitchen and the specific materials you choose, here's a general breakdown of the expenses you can expect:
Paint and Supplies
4. Consider Practical Factors
Don't forget to think about the practical aspects of your hardware, such as the size, shape, and placement. Ensure that the hardware is easy to grasp and complements the scale of your cabinets.
Budgeting for Your Cabinet Transformation
One of the biggest advantages of a cabinet makeover using paint and hardware is the cost-effective nature of the project. While the exact budget will depend on the size of your kitchen and the specific materials you choose, here's a general breakdown of the expenses you can expect:
Paint and Supplies
- Paint (2-3 coats): $50-$200 per gallon, depending on the type and brand
- Primer: $20-$50 per gallon
- Painting tools (brushes, rollers, trays): $50-$100
Hardware
- Cabinet knobs or pulls: $2-$20 per piece, depending on the material and style
- Hinges: $2-$10 per hinge, depending on the finish and type
By shopping sales, using coupons, and opting for budget-friendly options, you can typically transform your kitchen cabinets for as little as $500-$1,000, depending on the size of your kitchen and the scope of your project. This is a fraction of the cost of a full cabinet replacement, making it an incredibly cost-effective solution for homeowners and DIY enthusiasts. Key Takeaways In summary, revamping your kitchen cabinets with low-cost paint and hardware upgrades is a fantastic way to breathe new life into your culinary space without breaking the bank. By following the steps outlined in this comprehensive guide, you can achieve a high-end, custom-like look that will not only enhance the aesthetic appeal of your kitchen but also increase its perceived value. Remember, the key to a successful cabinet transformation lies in proper preparation, thoughtful paint and finish selection, and the careful installation of new hardware. With a little time, effort, and attention to detail, you can unlock the full potential of your kitchen cabinets and create a space that you'll be proud to show off to family and friends. Final Thoughts A kitchen cabinet makeover is a transformative project that can have a significant impact on the overall look and feel of your home. By leveraging affordable paint and stylish hardware upgrades, you can create a kitchen that reflects your personal style and preferences without the hefty price tag of a full-scale renovation. So why wait? Start planning your cabinet transformation today and enjoy the rewards of a beautifully refreshed kitchen for years to come.