Unlock the Hidden Potential of Old Furniture with These Incredible DIY Makeovers
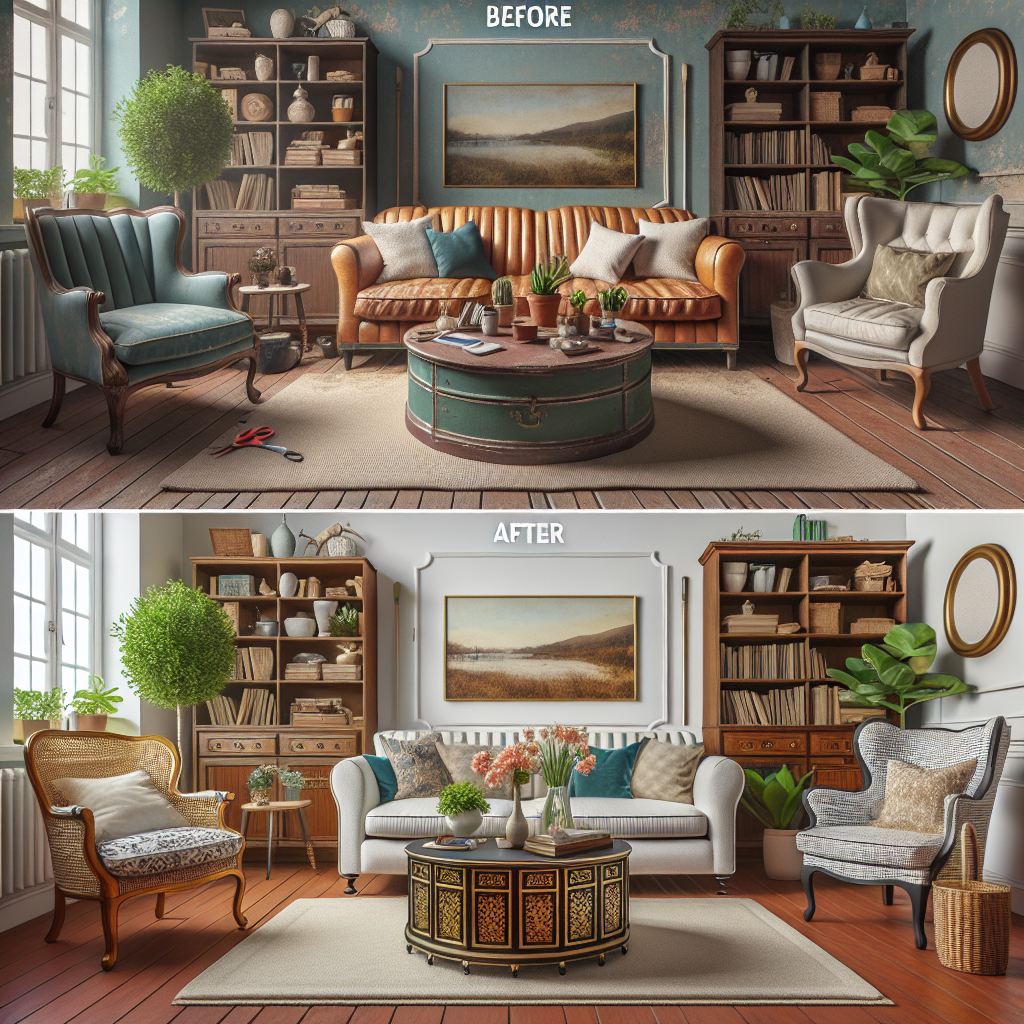
Are you tired of the same old living room layout and furniture? Believe it or not, you don't need to spend a fortune on brand-new pieces to breathe new life into your space. With a little creativity and elbow grease, you can transform forgotten, worn-out furniture into stylish, one-of-a-kind treasures that perfectly match your home's aesthetic. In this comprehensive guide, we'll explore a wide range of budget-friendly DIY furniture-upcycling techniques that will have your living room looking like it was professionally designed – without breaking the bank. Whether you're a seasoned DIYer or a complete beginner, you'll discover practical, easy-to-follow methods that require minimal tools and materials, yet deliver impressive results.Why Upcycle Furniture? The Benefits of DIY Revamps
Before we dive into the specifics, let's explore the many advantages of upcycling old furniture instead of buying new:1. Save Money
Purchasing brand-new living room furniture can quickly add up, often costing hundreds or even thousands of dollars. By revamping existing pieces, you can achieve a custom, high-end look for a fraction of the price.2. Reduce Waste
Landfills are overflowing with discarded furniture, much of which could be given new life through simple DIY projects. Upcycling helps reduce environmental impact and promotes sustainability.3. Unleash Creativity
Transforming old, tired furniture into something fresh and unique allows you to tap into your creative side. The process can be incredibly rewarding and can lead to one-of-a-kind pieces that perfectly reflect your personal style.4. Increase Home Value
Well-executed DIY furniture makeovers can significantly boost the overall aesthetic of your living room, which can, in turn, increase the perceived value of your home. This is especially beneficial if you're planning to sell in the future.Furniture-Upcycling Techniques: Unlock New Possibilities
Now that you understand the benefits, let's dive into the specific techniques you can use to revive your living room furniture:
1. Painting and Refinishing
One of the easiest and most impactful ways to update old furniture is through painting or refinishing. This approach works particularly well for wooden pieces like cabinets, shelves, and side tables. Steps:- Thoroughly clean and sand the surface to create a smooth base.
- Apply a high-quality primer suitable for the material (e.g., oil-based primer for wood).
- Choose a paint color that complements your living room's palette. Opt for a durable, long-lasting finish like latex or chalk paint.
- Apply multiple thin coats, allowing each to fully dry between applications.
- Finish with a protective sealant, such as a clear polyurethane, to enhance durability.
2. Upholstery Transformations
Breathe new life into old, worn-out upholstered furniture like sofas, armchairs, and ottomans by reupholstering them with fresh, stylish fabrics. Steps:- Carefully remove the existing fabric, taking note of how it's attached.
- Clean the underlying frame and make any necessary structural repairs.
- Select a high-quality upholstery fabric that aligns with your living room's design. Consider factors like durability, texture, and color.
- Use the old fabric as a template to cut the new pieces, allowing for seam allowances.
- Reattach the fabric, using staples, tacks, or upholstery nails as needed.
- Add decorative touches like buttons, trim, or decorative nail heads to enhance the final look.
3. Drawer and Door Upgrades
Breathe new life into dated cabinets, dressers, and other furniture with drawers or doors by swapping out the hardware. Steps:- Remove the existing hardware, such as knobs, pulls, or hinges.
- Clean the surfaces to ensure a smooth application of the new hardware.
- Choose replacement hardware that complements your living room's style, whether it's modern, vintage, or industrial.
- Install the new hardware, taking care to properly measure and align each piece.
4. Distressed and Rustic Finishes
For a charming, vintage-inspired look, consider adding distressed or rustic elements to your furniture. This technique works well for farmhouse-style or industrial-chic living rooms. Steps:- Start with a clean, sanded surface.
- Apply a base coat of paint in your desired color.
- Once dry, use sandpaper to strategically distress the edges and high-contact areas, revealing the underlying wood or paint.
- Optional: Apply a light stain or glaze to further enhance the aged appearance.
- Finish with a protective sealant, such as a matte or satin polyurethane.
5. Decoupage and Mod Podge
Transform plain furniture into unique, personalized pieces by incorporating decoupage techniques using Mod Podge or similar decoupage mediums. Steps:- Clean and lightly sand the surface of your furniture.
- Select decorative paper, fabric, or other materials to adhere to the piece.
- Apply a generous coat of Mod Podge to the furniture surface.
- Carefully place and smooth the decorative elements onto the Mod Podge.
- Once dry, apply a top coat of Mod Podge to seal and protect the design.
Practical Tips and Tricks for Furniture-Upcycling Success