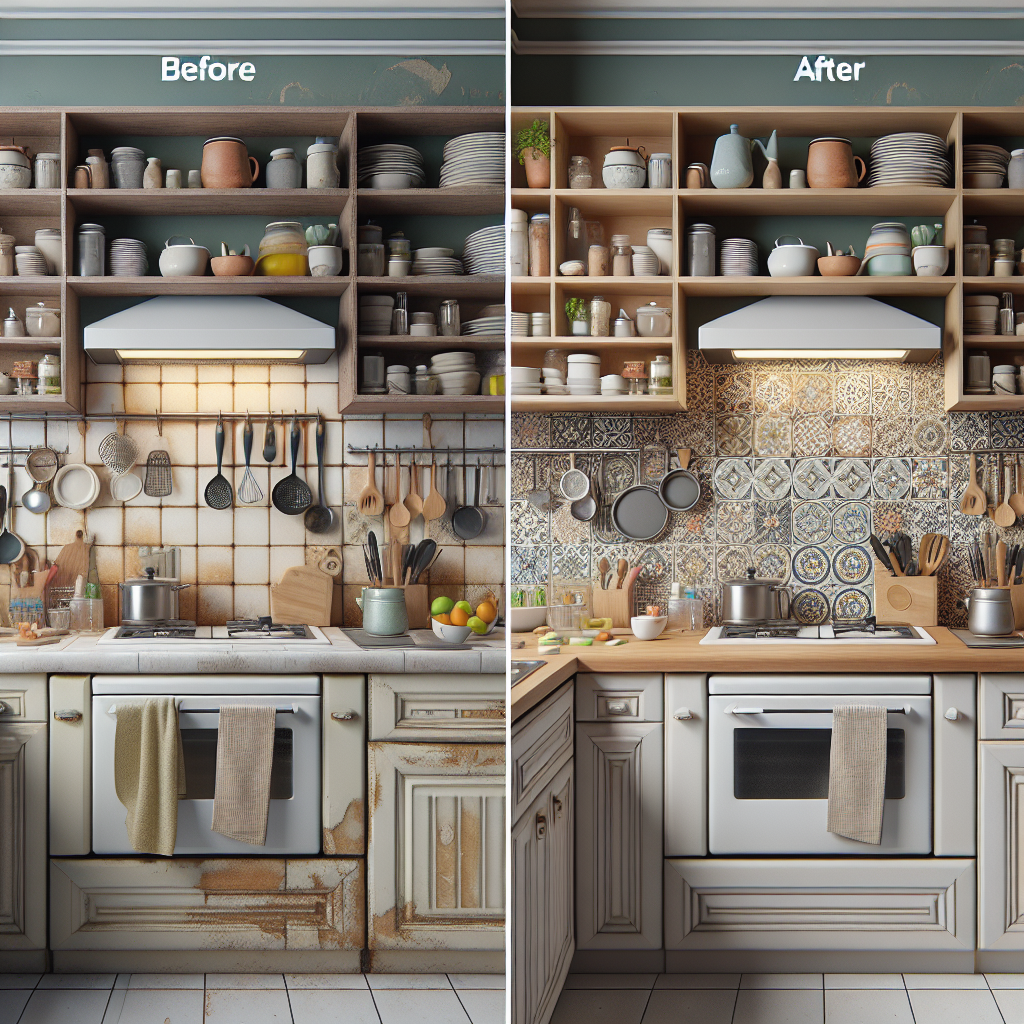
Master the Techniques of Installing Peel-and-Stick Tiles for a Stunning Backsplash Makeover Under $100
Are you tired of looking at the dated, dull backsplash in your kitchen? Dreaming of a fresh, modern look but daunted by the prospect of a major renovation? Fear not, DIY enthusiasts! With the right materials and a bit of elbow grease, you can revamp your kitchen backsplash on a shoestring budget and achieve a professional-grade result. In this comprehensive guide, we'll walk you through the step-by-step process of installing peel-and-stick tiles to breathe new life into your kitchen. From selecting the perfect tiles to mastering the installation techniques, you'll learn everything you need to know to transform your backsplash for under $100.Understanding Peel-and-Stick Tiles: The Budget-Friendly Alternative
Peel-and-stick tiles, also known as self-adhesive or Smart Tiles, are a game-changing option for budget-conscious homeowners and DIY enthusiasts. These tiles offer a hassle-free installation process, eliminating the need for messy mortar, grout, or specialized tools. The beauty of peel-and-stick tiles lies in their simplicity. They come with a strong adhesive backing that adheres directly to your existing backsplash, creating a seamless and modernized look. These tiles are available in a wide range of styles, from classic subway patterns to trendy hexagons and beyond, allowing you to find the perfect fit for your kitchen's aesthetic. One of the biggest advantages of peel-and-stick tiles is their affordability. Compared to traditional tile installations, which can quickly add up in material and labor costs, peel-and-stick tiles offer a significantly lower price point. You can typically find high-quality options for $10 to $20 per square foot, making it possible to revamp your entire backsplash for under $100, depending on the size of your kitchen.Preparing Your Backsplash for Tile Installation
Before you dive into the tile installation process, it's crucial to properly prepare your backsplash surface. This step will ensure a strong, long-lasting adhesion and a professional-looking finish.Step 1: Clean and Degloss the Existing Surface
Start by thoroughly cleaning your backsplash with a degreasing cleaner or a mixture of warm water and dish soap. This will remove any built-up grease, grime, or residue that could interfere with the adhesive's ability to bond. Once the surface is clean, use a deglosser or a light sanding sponge to dull any glossy or shiny finishes. This will help the peel-and-stick tiles adhere more effectively.Step 2: Measure and Plan Your Layout
Carefully measure the area you intend to cover with the new tiles. This will help you determine the number of tiles needed and plan the most efficient layout. Consider starting from the center of the backsplash and working outward, ensuring a balanced and symmetrical design.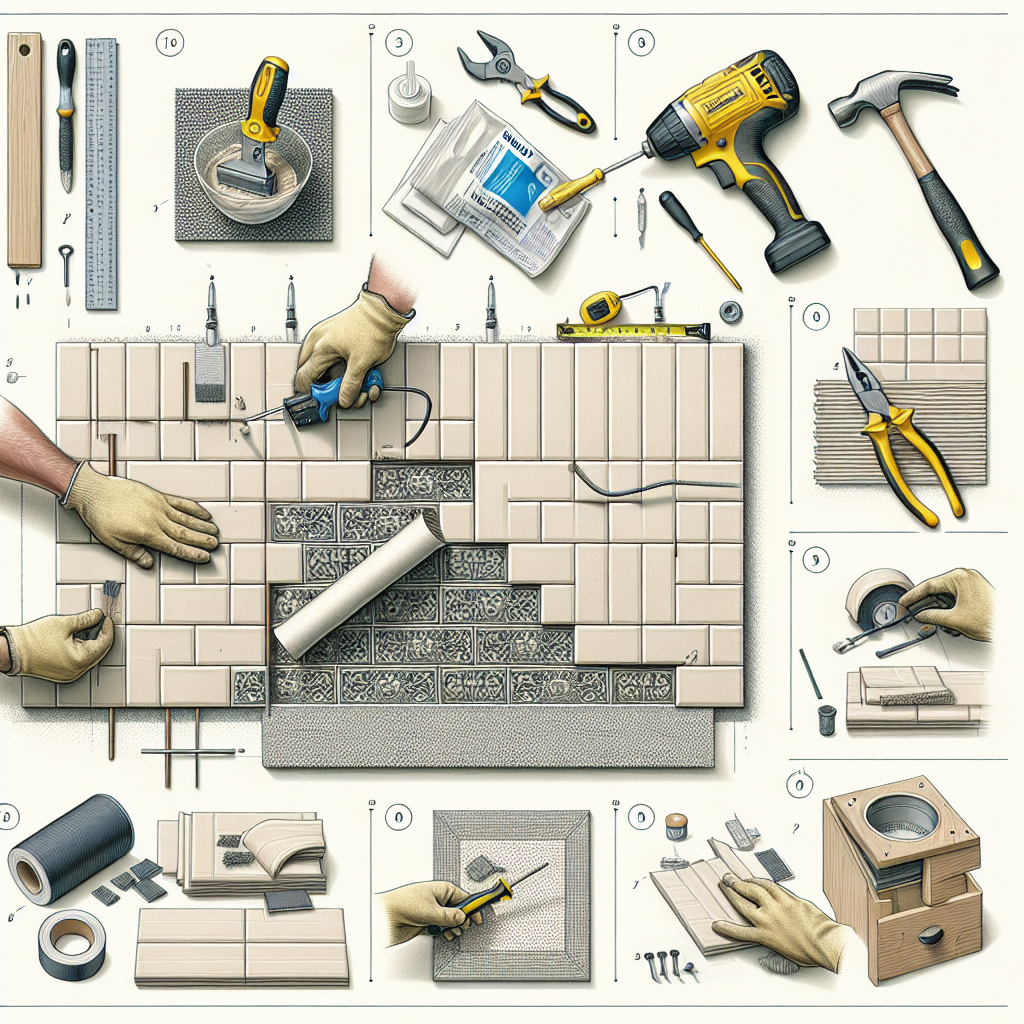
Step 3: Mark Reference Lines
Use a level and a pencil to draw reference lines on your backsplash. These lines will serve as a guide for aligning your tiles and ensuring a straight, even installation.Mastering the Peel-and-Stick Tile Installation Process
Now that your backsplash is prepped and ready, it's time to start the tile installation. Follow these step-by-step instructions for a seamless and professional-looking result:Step 1: Cut Tiles to Fit
If your backsplash has any outlets, corners, or irregular shapes, you'll need to measure and cut the tiles to fit. Use a sharp utility knife or a tile cutter to make clean, precise cuts.Step 2: Peel and Stick
Carefully peel off the backing from the tile, exposing the adhesive. Starting from your reference lines, place the tile firmly onto the backsplash, pressing down firmly to ensure a secure bond.Step 3: Overlap and Align
When installing the next tile, slightly overlap the edge with the previous one. Align the tiles carefully to maintain a consistent grout line and a seamless, professional appearance.Step 4: Use a Roller for Adhesion
Once the tiles are in place, use a small roller or a wooden block to firmly press down on each tile. This will help the adhesive bond with the backsplash surface and prevent any air bubbles or gaps.Step 5: Trim and Seal the Edges
For a polished finish, use a utility knife to trim any tiles that meet the edges of your backsplash. Apply a bead of silicone caulk along the edges to seal any gaps and create a waterproof seal.Troubleshooting Common Challenges
As with any DIY project, you may encounter a few challenges along the way. Here are some common issues and solutions to help you navigate the process:Air Bubbles or Gaps
If you notice any air bubbles or gaps between the tiles, simply lift the affected tile, reapply the adhesive, and firmly press it back into place using a roller.Uneven or Crooked Tiles
Ensure that you're aligning the tiles carefully and using your reference lines as a guide. If a tile is not straight, gently lift it and reposition it before firmly pressing it down.