Master the Art of DIY Weatherproofing: Prepare Your Home for Winter
Learn Practical, Cost-Effective Techniques to Insulate Your Home and Save on Energy Bills During the Cold Season
As the temperature starts to drop and the leaves begin to fall, it's time to shift our attention to preparing our homes for the impending winter. One of the most crucial aspects of this seasonal maintenance is weatherproofing - the process of sealing and insulating your home to minimize heat loss, reduce energy costs, and create a more comfortable living environment. In this comprehensive guide, we'll explore a range of practical, cost-effective DIY weatherproofing techniques that you can implement to get your home winter-ready. From air sealing to insulation upgrades, we'll cover the essential steps to boost your home's energy efficiency and protect it from the harsh elements of the cold season.Understanding the Importance of Weatherproofing
Proper weatherproofing is essential for maintaining a comfortable and energy-efficient home during the winter months. When your home is not adequately sealed and insulated, it can lead to several issues:- Heat loss: Uninsulated or poorly sealed areas allow warm air to escape, causing your heating system to work harder and consume more energy to maintain the desired temperature.
- Drafts and cold spots: Gaps and cracks can create uncomfortable drafts and uneven temperatures throughout your home, making some rooms feel much colder than others.
- Increased energy costs: The harder your heating system has to work to compensate for heat loss, the more energy it will consume, resulting in higher utility bills.
- Potential damage: Uncontrolled air infiltration can also lead to moisture problems, mold growth, and other structural issues that can compromise the integrity of your home over time.
- Enhanced energy efficiency: Reduced heat loss and air leaks can significantly lower your heating costs, potentially saving you hundreds of dollars on your annual energy bills.
- Improved comfort: A well-sealed and insulated home will maintain a more consistent temperature, eliminating drafts and hot and cold spots for a more comfortable living environment.
- Increased home value: Effective weatherproofing measures can boost your home's energy efficiency and curb appeal, potentially increasing its resale value.
- Environmental benefits: Reducing your energy consumption also helps to lower your carbon footprint and contribute to a more sustainable future.
Identifying Air Leaks and Drafts
The first step in any successful weatherproofing project is to identify the areas of your home that are most susceptible to air leaks and drafts. These problem spots can be found both inside and outside your home, and they often occur around windows, doors, electrical outlets, attic hatches, and other openings. To detect air leaks, you can perform a simple DIY home energy audit using the following techniques:Visual Inspection
Carefully inspect your home, both inside and out, for signs of air leaks, such as:- Gaps around windows and doors
- Cracks in the foundation, walls, or ceiling
- Gaps around electrical outlets, plumbing fixtures, and other penetrations
- Loose or missing weatherstripping or caulking
Smoke Test
Use a smoke pencil or incense stick to identify areas where air is escaping. Move the smoke source around your home, paying close attention to windows, doors, and other potential problem spots. Any areas where the smoke is visibly drawn outward indicate an air leak.Blower Door Test
For a more comprehensive assessment, consider hiring a professional to conduct a blower door test. This specialized equipment temporarily depressurizes your home, allowing the technician to precisely locate and measure air leaks throughout the structure. Once you've identified the areas that need attention, you can begin addressing them with various weatherproofing techniques.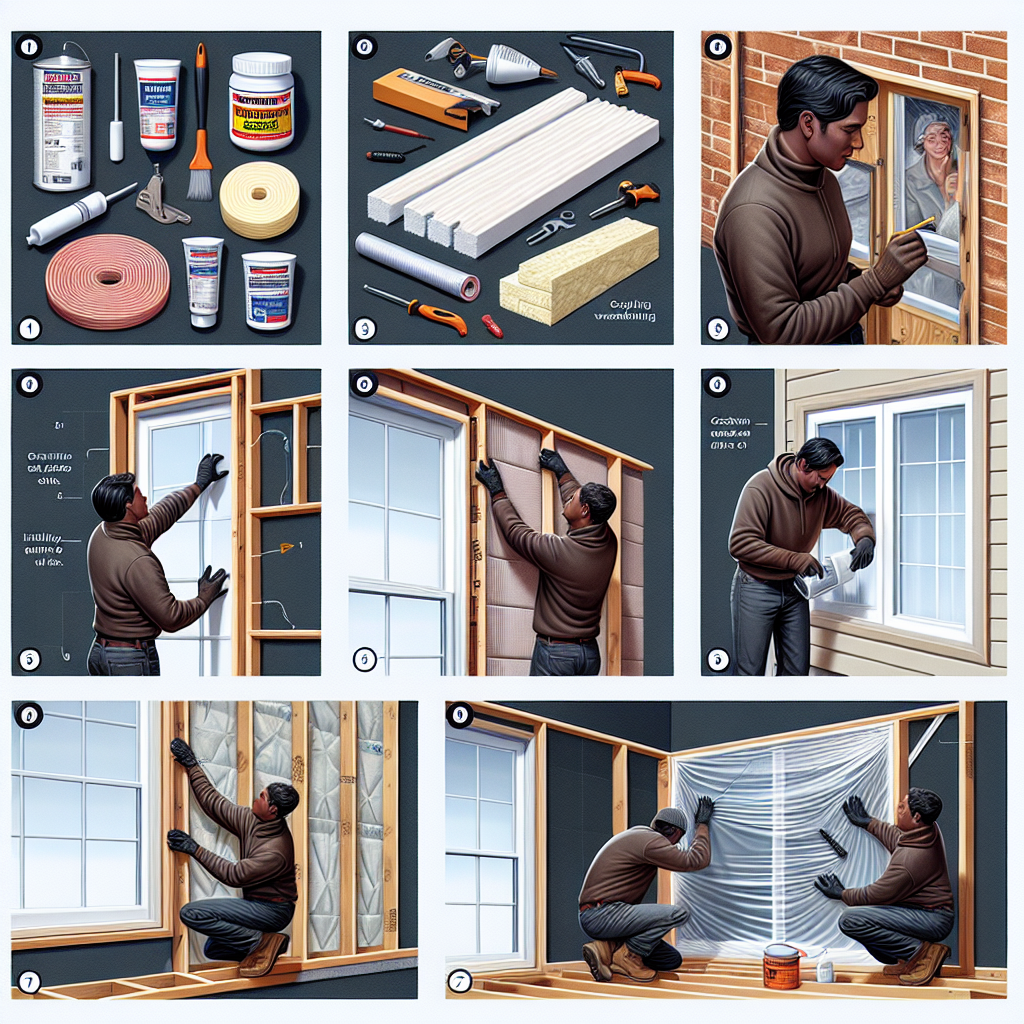
Sealing Air Leaks
Sealing air leaks is one of the most effective and cost-efficient ways to improve your home's energy efficiency and comfort. By addressing these problem areas, you can significantly reduce heat loss and minimize drafts.Caulking and Weatherstripping
Caulking and weatherstripping are two of the most common and effective methods for sealing air leaks around windows, doors, and other openings. Choose a high-quality, flexible caulk or weatherstripping material that is designed for the specific application and climate conditions in your area. Steps for Caulking:- Thoroughly clean the surface to remove any dirt, debris, or old caulk.
- Cut the caulk nozzle at a 45-degree angle to create a 1/4-inch bead.
- Apply the caulk in a continuous, even line, smoothing it with a putty knife or your finger.
- Allow the caulk to fully cure according to the manufacturer's instructions before painting or finishing the area.
- Measure the area carefully to ensure a proper fit.
- Clean the surface thoroughly before applying the weatherstripping.
- Press the material firmly into place, compressing it as needed to create a tight seal.
- Replace any worn or damaged weatherstripping to maintain an effective barrier.
Foam Sealants and Gaskets
For larger gaps and cracks, use expanding foam sealants or pre-cut foam gaskets to fill the spaces and create an airtight barrier. These materials are particularly effective for sealing openings around plumbing fixtures, electrical outlets, and other penetrations. Applying Foam Sealants:- Ensure the area is clean and dry before applying the foam.
- Protect nearby surfaces with painter's tape or plastic sheeting.
- Carefully read and follow the manufacturer's instructions for proper application.
- Allow the foam to fully cure before trimming any excess material.
Upgrading Insulation
Proper insulation is a crucial component of weatherproofing your home. By adding or upgrading insulation in key areas, you can significantly improve your home's thermal performance and reduce energy consumption.Attic Insulation
The attic is often one of the most important areas to focus on when it comes to insulation. Heat naturally rises, and an uninsulated attic can be a major source of heat loss during the winter. Recommended R-Values for Attic Insulation:- Climate Zone 4 (most of the U.S.): R-49 to R-60
- Climate Zone 5 (Northern U.S. and Canada): R-60 or higher
Wall Insulation
Insulating your home's exterior walls can also have a significant impact on energy efficiency and comfort. If your home was built before modern insulation standards, it may have inadequate or even no wall insulation at all. Depending on your home's construction, you may be able to add insulation from the interior or exterior. Common wall insulation options include fiberglass batts, blown-in cellulose, or spray foam.Basement and Crawl Space Insulation
Don't forget to insulate your home's foundation, including the basement and crawl space. These areas are often overlooked but can be major sources of heat loss.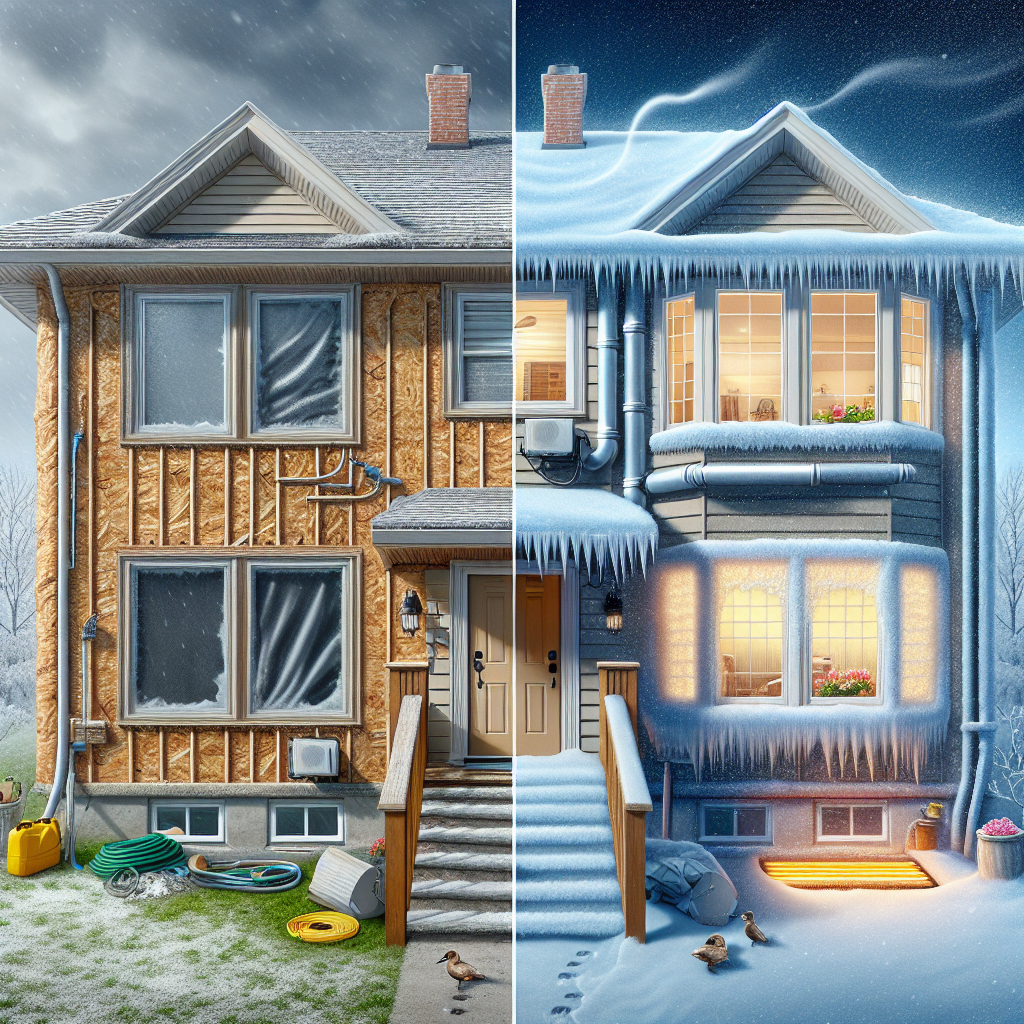
Addressing Windows and Doors
Windows and doors are another significant source of heat loss in many homes. Upgrading or improving these areas can provide substantial energy savings and comfort benefits.Window Upgrades
If your home has older, single-pane windows, consider replacing them with energy-efficient models. Look for windows with a high R-value (a measure of insulation) and low U-factor (a measure of heat transfer). For a more budget-friendly option, you can install window insulation film or storm windows to create an additional layer of protection.Door Upgrades
Ensure your exterior doors are properly sealed and insulated. Replace any worn or damaged weatherstripping, and consider upgrading to an energy-efficient door with a high R-value. For sliding glass doors or other large openings, install a storm door to create an additional barrier against heat loss.Maintaining Your Home's Weatherproofing
Weatherproofing your home is an ongoing process, and regular maintenance is essential to ensure its long-term effectiveness. Here are some tips to keep your home's weatherproofing in top shape:- Conduct annual inspections to identify and address any new air leaks or areas in need of re-caulking or weatherstripping.
- Clean and maintain your home's insulation, checking for any signs of damage or degradation.
- Monitor your energy bills and indoor comfort levels to identify any changes that may indicate a need for further weatherproofing measures.
- Consider hiring a professional energy auditor every few years to perform a comprehensive assessment and identify any areas for improvement.