Elevate Your Outdoor Living with a Stunning DIY Stone Fire Pit
Are you dreaming of cozy backyard gatherings, toasted marshmallows, and the mesmerizing dance of flickering flames? Building a DIY stone fire pit is the perfect way to transform your outdoor space and add lasting value to your home. Not only is it a rewarding project that lets you flex your DIY muscles, but it also serves as a gorgeous, functional centerpiece that will become the heart of your backyard oasis. In this comprehensive guide, we'll walk you through the step-by-step process of constructing a beautiful stone fire pit, from sourcing materials to hosting your first fireside soiree. Whether you're a seasoned DIYer or a beginner homeowner, you'll master the art of stone masonry and create a stunning, custom feature that will elevate your outdoor living experience for years to come.Why Build a DIY Stone Fire Pit?
Investing in a professionally installed fire pit can easily cost thousands of dollars, but with some elbow grease and our expert guidance, you can build one yourself for a fraction of the price. Not only will you save money, but you'll also gain a immense sense of pride and accomplishment from completing this rewarding project. Beyond the cost savings, a DIY stone fire pit offers numerous benefits that make it a smart addition to any backyard:- Extends Usable Outdoor Living Space: A fire pit creates a cozy, inviting gathering spot that encourages you and your guests to linger outdoors long into the evening hours, expanding the functionality of your backyard.
- Increases Home Value: Outdoor living features like a fire pit are highly desirable to homebuyers, potentially boosting your home's resale value by 5-15%.
- Enhances Ambiance and Aesthetic: The warm glow and rustic elegance of a stone fire pit instantly elevates the look and feel of your backyard, transforming it into a serene, inviting oasis.
- Provides Year-Round Enjoyment: You can use your fire pit well into the cooler months, extending the time you can comfortably spend outdoors.
- Fosters Togetherness: A fire pit creates a natural gathering spot that encourages family and friends to unwind, connect, and make lasting memories together.
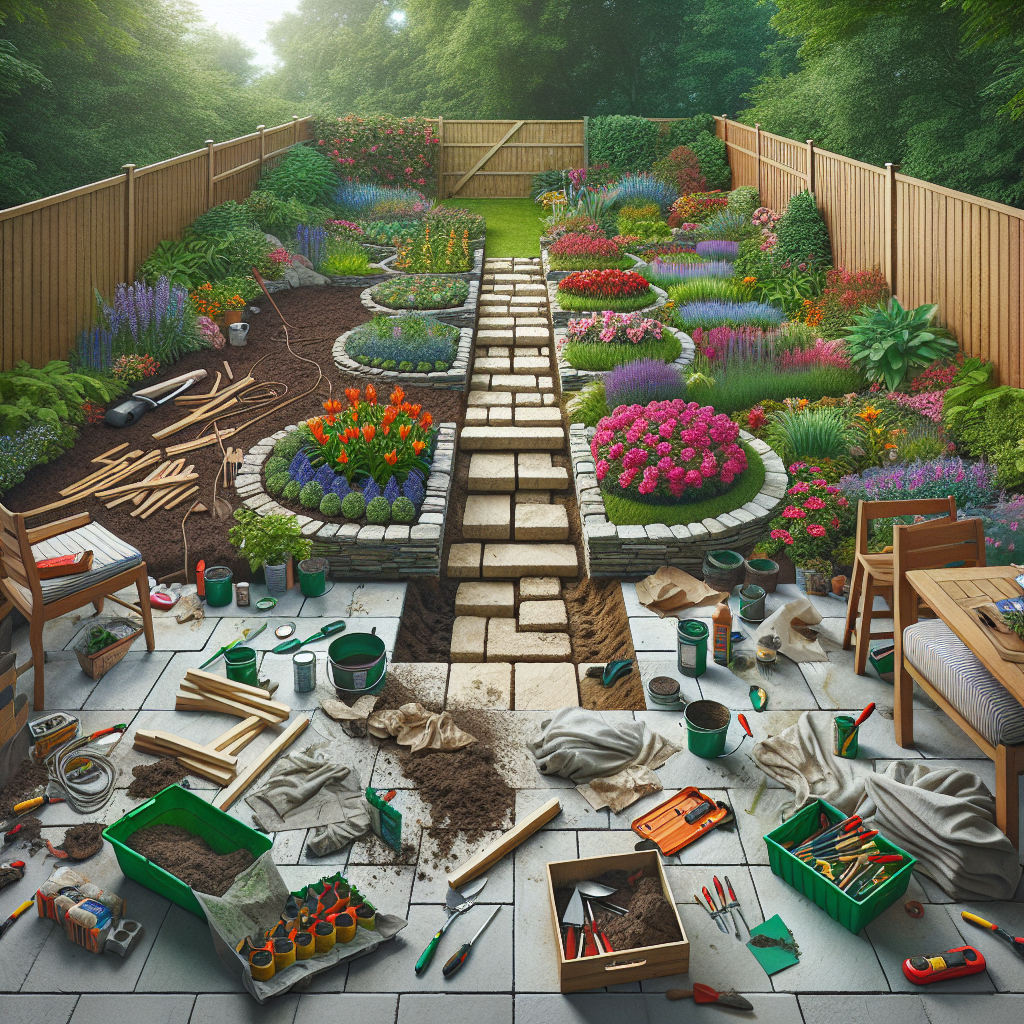
Choosing the Right Location and Size
The first step in your DIY fire pit journey is selecting the perfect spot in your backyard. Consider the following factors when choosing a location:Placement and Clearance
Position your fire pit at least 10-15 feet away from any structures, trees, or overhead branches to ensure safe operation and prevent accidental fires. Avoid placing it directly under power lines or near flammable materials. Additionally, situate the fire pit on a level, stable surface to prevent tipping or uneven burning.Accessibility and Visibility
Choose a location that is easily accessible from your patio, deck, or main gathering areas. This will encourage use and make it convenient for entertaining. Positioning the fire pit in a prominent, visible spot also enhances its aesthetic appeal and creates an inviting focal point in your backyard.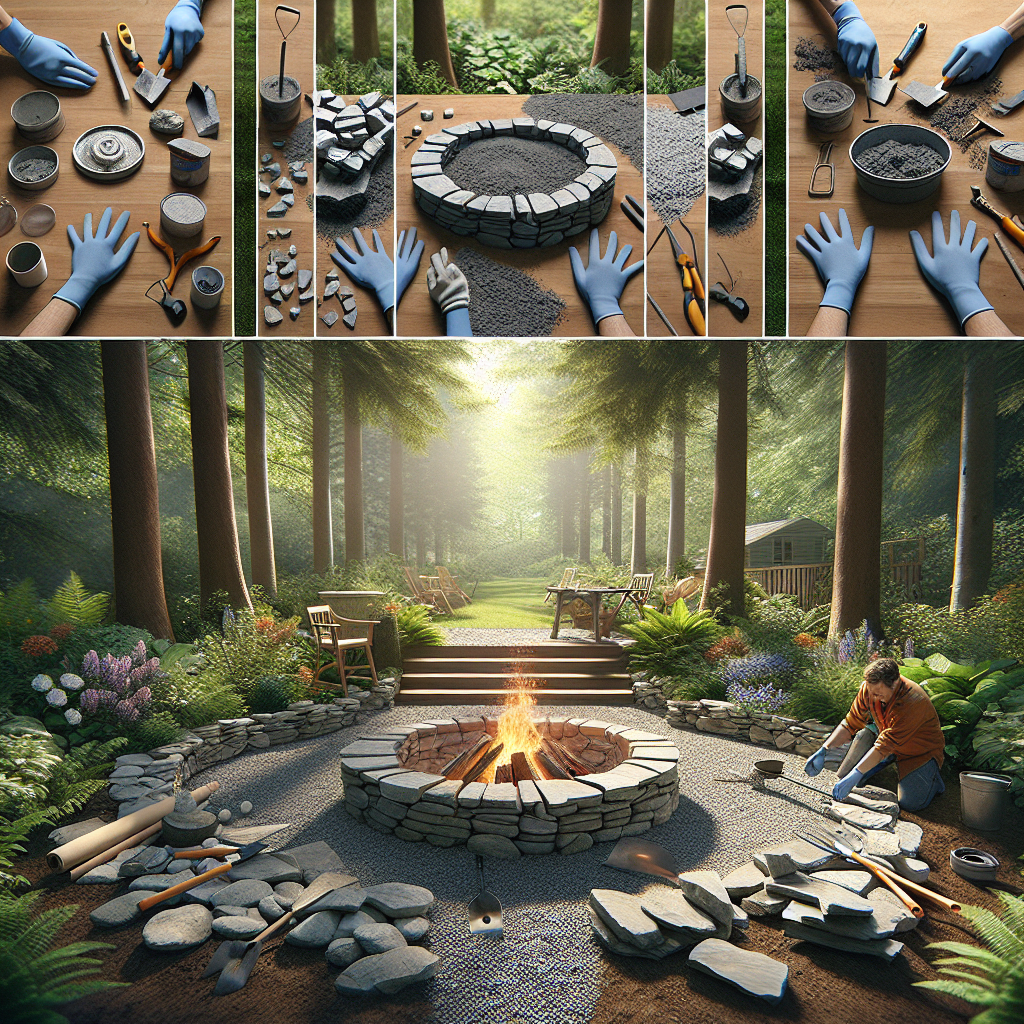
Determining the Ideal Size
The size of your fire pit will depend on the available space in your backyard and your intended use. As a general guideline, aim for a diameter between 36-60 inches. This size range provides ample room for a cozy, intimate gathering while still maintaining a manageable scale. Keep in mind that larger fire pits require more materials and construction effort, so starting with a medium-sized pit (around 4-5 feet in diameter) is often the most practical choice for DIY projects.Sourcing Materials and Tools
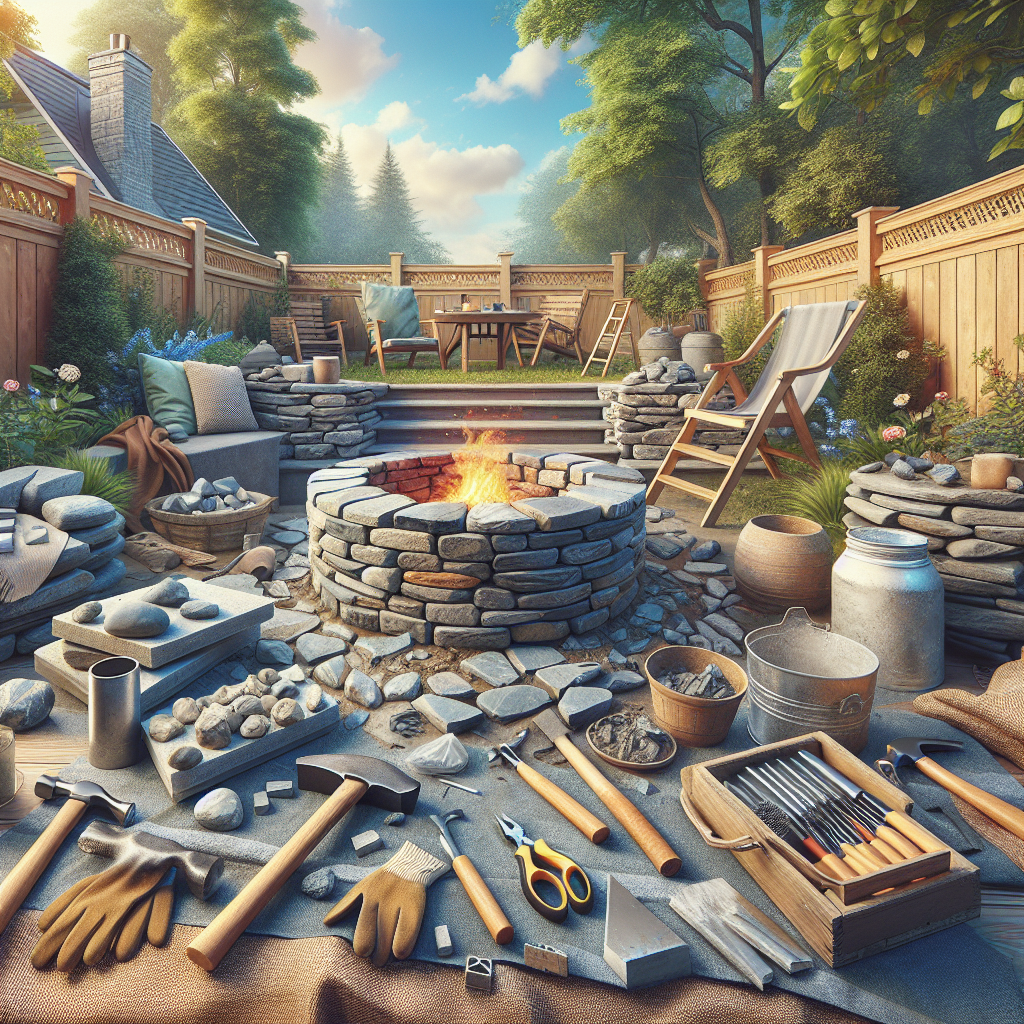
With the perfect location selected, it's time to gather the necessary materials and tools to bring your DIY stone fire pit to life. Here's what you'll need:Materials
- Firebrick or Refractory Bricks: These specialized bricks are designed to withstand high temperatures without cracking or crumbling. Plan for around 60-100 bricks, depending on the size of your fire pit.
- Exterior Stone or Veneer: Choose a durable, heat-resistant stone like fieldstone, flagstone, or natural stone. You'll need enough to create a 12-inch wide wall around the firebrick base.
- Mortar and Sand: High-heat resistant mortar is essential for bonding the firebricks and exterior stones. Plan for 2-4 bags of mortar and 1-2 bags of sand.
- Gravel or Crushed Stone: Create a stable, well-draining base for your fire pit with 2-4 inches of gravel or crushed stone.
- Optional Accessories: Consider adding a fire pit grate, spark screen, or decorative steel ring for enhanced functionality and safety.
Tools
- Trowel: A masonry trowel is essential for applying and shaping the mortar.
- Wheelbarrow: Use a wheelbarrow to mix and transport the mortar and other heavy materials.
- Level: Ensure your fire pit base and walls are perfectly level with a 4-foot level.
- Hammer and Chisel: Shape and fit the stones as needed with a masonry hammer and chisel.
- Gloves and Safety Gear: Protect your hands and eyes with sturdy work gloves and safety glasses.
- Other Essentials: Bucket, water hose, measuring tape, string, and a kneeling pad for comfort during construction.
Step-by-Step Guide to Construction
Follow these detailed steps to transform your backyard into a cozy, inviting oasis with a stunning stone fire pit:Prepare the Base
1. Clear and level the designated fire pit area, removing any grass, weeds, or debris. 2. Excavate the soil to create a 4-6 inch deep hole for your gravel base. 3. Add 2-4 inches of gravel or crushed stone and compact it firmly using a tamping tool or plate compactor. 4. Use a level to ensure the gravel base is completely flat and level.Lay the Firebrick Foundation
1. Begin laying the firebricks in a circular pattern, starting from the center and working your way outward. 2. Apply a thin layer of high-heat mortar between each brick to secure them in place. 3. Stagger the seams between bricks for maximum stability and structural integrity. 4. Use a level to confirm the firebrick base is perfectly flat and level.Build the Exterior Stone Wall
1. Create a 12-inch wide wall around the firebrick base using your chosen exterior stones. 2. Apply a generous layer of mortar to the top of the firebrick base and begin placing the first course of stones. 3. Stagger the seams between stones and use the mortar to create a sturdy, level foundation. 4. Continue building the wall, applying mortar between each course of stones. 5. Use a level and plumb line to ensure the walls are perfectly vertical and even. 6. Fill any gaps between stones with mortar for a seamless, polished appearance.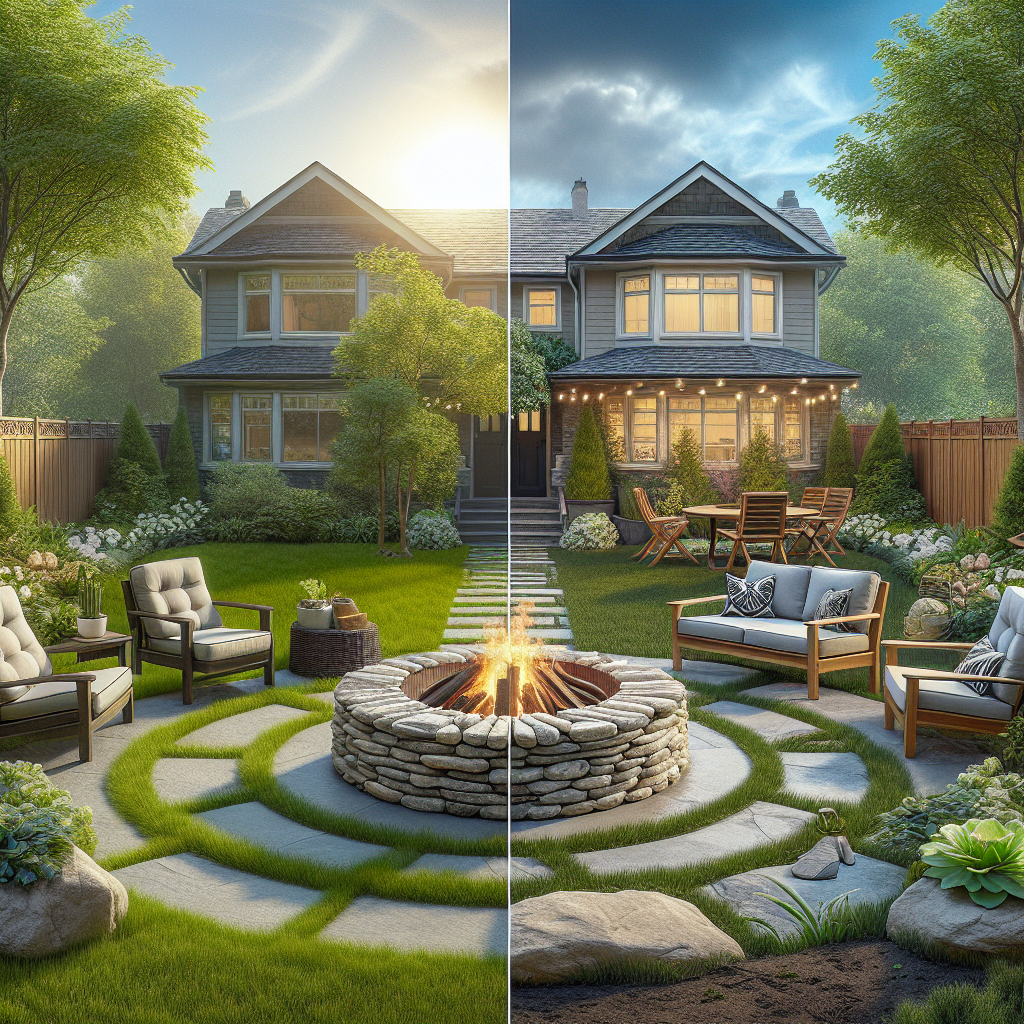
Add the Finishing Touches
1. Once the mortar has fully cured (typically 24-48 hours), perform a final inspection of your work. 2. Use a chisel and hammer to shape or trim any stones as needed for a clean, uniform look. 3. Consider adding optional accessories like a fire pit grate, spark screen, or decorative steel ring. 4. Spread a 1-2 inch layer of gravel or crushed stone inside the fire pit to create a finished surface. Congratulations! Your stunning DIY stone fire pit is now complete and ready to enjoy. Light the first fire, gather your loved ones, and bask in the warm glow of your new backyard centerpiece.Maintaining and Enjoying Your Fire Pit
Proper care and maintenance will ensure your stone fire pit remains in top condition for years to come. Here are some tips to keep it looking and functioning its best:Cleaning and Clearing
After each use, allow the fire pit to cool completely. Then, use a metal poker or shovel to remove any ash or unburned wood. Periodically, use a wire brush to clear away any soot buildup on the stones.Inspecting for Damage
Regularly check the condition of your fire pit, looking for any cracks, chips, or loose stones. Address any issues promptly to prevent further damage and maintain structural integrity.Protecting from the Elements
Consider investing in a durable fire pit cover to shield it from rain, snow, and debris when not in use. This will extend the life of your investment and keep it looking its best.Enjoying Year-Round
With proper maintenance, you can use your stone fire pit well into the cooler months. Just be sure to clear away any snow or ice before lighting a fire. Add a few strategically placed outdoor heaters or blankets to create a cozy, inviting atmosphere.Key Takeaways
Building a DIY stone fire pit is a rewarding project that transforms your backyard into a stunning, functional outdoor oasis. By following our comprehensive guide, you'll master the art of stone masonry and create a beautiful, custom feature that adds lasting value to your home. Remember these key takeaways:- Carefully select the perfect location and size for your fire pit, considering factors like clearance, accessibility, and visibility.
- Source high-quality, heat-resistant materials like firebrick, exterior stone, mortar, and gravel to ensure a long-lasting, safe structure.
- Methodically follow the step-by-step construction process, using a level and proper masonry techniques to build a sturdy, visually appealing fire pit.
- Maintain your investment with regular cleaning, inspections, and protective measures to enjoy your fire pit for years to come.