Make Your Bathroom Look New Again: A Comprehensive Guide to Repairing Tile Grout
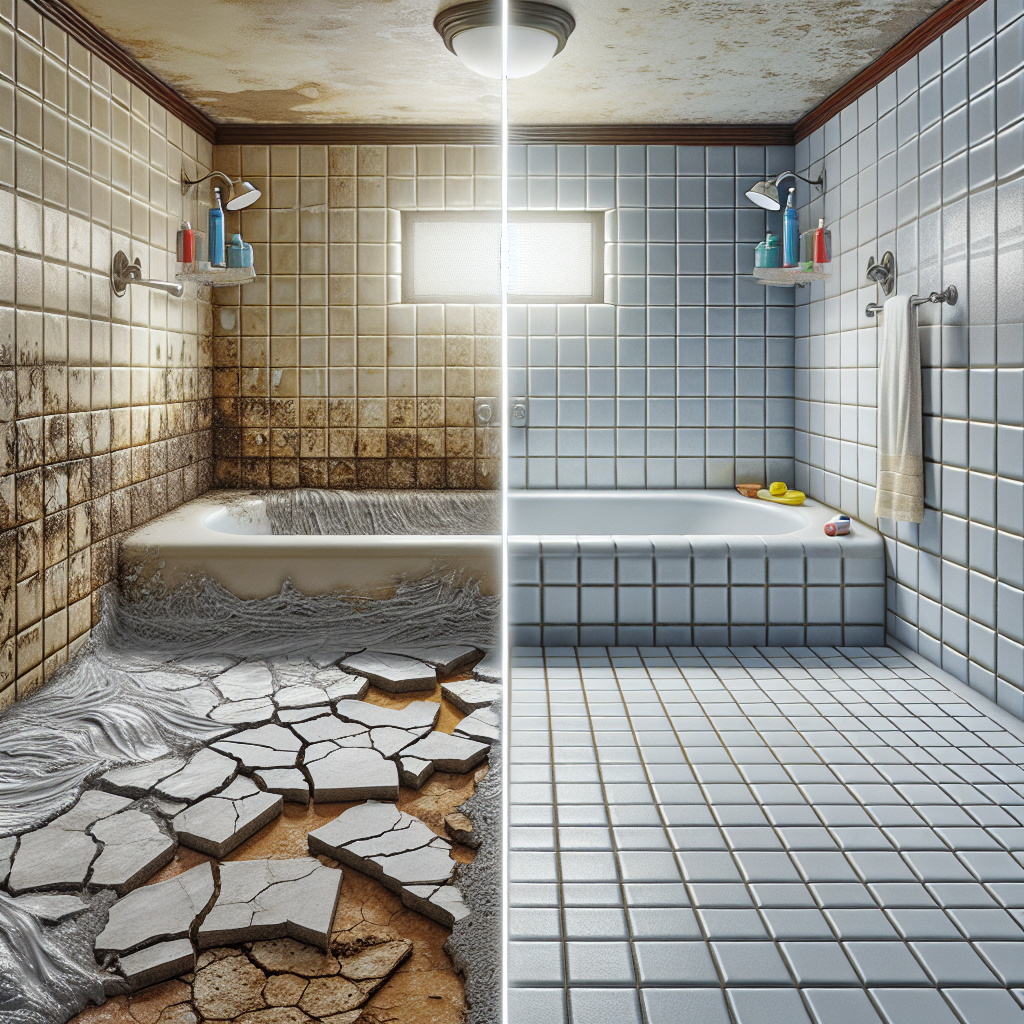
Are you tired of staring at your bathroom tiles, only to be met with discolored, cracked, or missing grout? Grout, the unsung hero of tiled surfaces, plays a crucial role in maintaining the integrity and aesthetic appeal of your bathroom. But fear not, restoring your tile grout can breathe new life into your space and make it look as good as new. In this comprehensive guide, we'll take you through the step-by-step process of repairing tile grout, from identifying the problem to choosing the right materials and techniques. Whether you're a seasoned DIYer or a homeowner tackling your first project, this article will equip you with the knowledge and confidence to transform your bathroom into a sparkling, fresh-looking oasis.Understanding Tile Grout and Common Issues
Tile grout is the mortar-like material that fills the gaps between individual tiles, creating a seamless and durable surface. Over time, however, grout can become discolored, cracked, or even start to crumble, leading to a variety of issues.Discolored Grout
Grout discoloration is one of the most common problems homeowners face. This can be caused by a variety of factors, including:- Dirt, grime, and mildew buildup
- Exposure to water and moisture
- Improper cleaning or maintenance techniques
- Chemical stains from products used in the bathroom
Cracked or Loose Grout
Cracked or loose grout can be the result of:- Structural movement or settling of the tiles
- Excessive moisture or water exposure
- Poor initial installation of the grout
- Damage from heavy use or impact
Missing Grout
Missing grout, often referred to as "grout lines," can occur due to:- Improper installation or application of the grout
- Deterioration over time due to moisture, wear, and tear
- Accidental removal during cleaning or maintenance
Preparing for Grout Repair
Before you begin the grout repair process, it's essential to properly prepare the area. This ensures a successful and long-lasting repair.Cleaning the Tile Surface
Start by thoroughly cleaning the tile and grout lines. Use a grout brush or a stiff-bristled scrub brush to remove any dirt, grime, or mildew buildup. You can also use a dedicated grout cleaner or a mixture of warm water and mild detergent. Rinse the area thoroughly and allow it to dry completely before proceeding.Assessing the Extent of Damage
Carefully inspect the tile grout, looking for any cracks, missing segments, or areas that need to be addressed. This will help you determine the scope of the repair work and ensure you have the necessary materials and tools on hand.Choosing the Right Grout
Select a grout that matches the color and type of your existing tile. Most home improvement stores offer a wide range of grout options, including sanded, unsanded, and epoxy-based varieties. Consider factors like the size of the grout lines, the expected moisture exposure, and the desired finish when making your selection.
Gathering the Necessary Tools
Ensure you have the following tools and materials ready for the grout repair process:- Grout float or rubber squeegee
- Grout saw or utility knife
- Grout sponge or damp cloth
- Painter's tape (optional)
- Bucket or container for mixing grout
- Protective gear (gloves, goggles, and a mask)
Repairing Discolored Grout
Discolored grout can be a common eyesore in bathrooms, but it's a relatively easy problem to address. Here's how to restore the luster and clean appearance of your tile grout:Step 1: Clean the Grout Lines
Start by thoroughly cleaning the grout lines. Use a grout brush or a stiff-bristled scrub brush to remove any dirt, grime, or mildew buildup. You can also use a dedicated grout cleaner or a mixture of warm water and mild detergent. Rinse the area thoroughly and allow it to dry completely.Step 2: Apply a Grout Haze Remover
If the discoloration is caused by a grout haze (a thin film that can develop during the initial grout application), use a grout haze remover to break down and remove the excess material. Follow the manufacturer's instructions carefully, as these products often require specific dwell times and techniques.Step 3: Re-Seal the Grout
Once the grout lines are clean and free of any haze, it's time to apply a grout sealer. This will help protect the grout from future discoloration and staining. Choose a sealer that is compatible with your tile type and the grout you're using. Apply the sealer according to the manufacturer's instructions, ensuring complete coverage of the grout lines.Step 4: Consider Re-Grouting
If the discoloration is severe or the grout is still looking dull after cleaning and sealing, you may need to re-grout the affected areas. This involves removing the old grout and applying a fresh layer. Be sure to follow the proper grout application techniques to ensure a long-lasting and professional-looking result.Repairing Cracked or Loose Grout
Cracked or loose grout can compromise the structural integrity of your tiled surfaces and lead to further damage if left unattended. Here's how to address this issue:Step 1: Remove the Damaged Grout
Use a grout saw, utility knife, or an oscillating multi-tool with a grout removal blade to carefully remove the damaged or cracked grout from the affected areas. Take care not to damage the surrounding tiles.Step 2: Clean the Grout Lines
Once the damaged grout has been removed, thoroughly clean the grout lines to ensure a proper bond for the new grout. Use a grout brush or a stiff-bristled scrub brush to remove any debris or residue.Step 3: Apply the New Grout
Mix the new grout according to the manufacturer's instructions, ensuring a smooth, lump-free consistency. Using a grout float or rubber squeegee, apply the grout into the cleaned grout lines, pressing it firmly to fill any gaps or voids.