
Why Build a DIY Fire Pit?
A fire pit is the ultimate addition to any outdoor living space, transforming your backyard into a cozy gathering spot for friends and family. Not only does it provide warmth and ambiance on chilly nights, but it also serves as a central hub for s'mores, lively conversations, and memorable moments. What's more, building your own DIY fire pit is a rewarding project that can be completed in a single weekend, allowing you to customize the design to suit your style and space. In this comprehensive guide, we'll walk you through the step-by-step process of constructing a beautiful, functional fire pit that will elevate your outdoor experience. Whether you're a seasoned DIYer or a first-time home improvement enthusiast, you'll learn everything you need to know to plan, build, and maintain your very own backyard oasis.Choosing the Right Location for Your Fire Pit
The first step in your DIY fire pit journey is selecting the perfect location. Here are a few key factors to consider:Safety First
Safety should be your top priority when choosing a spot for your fire pit. Avoid placing it too close to your home, any overhanging trees or structures, or dry vegetation that could easily catch fire. Experts recommend a minimum clearance of 10-15 feet from any buildings or flammable materials.Level Ground
Your fire pit needs to be built on a level, stable surface to prevent it from tipping or becoming unstable over time. Avoid areas with a steep slope or uneven terrain, as this can make it challenging to construct and use safely.Accessibility and Visibility
Consider how you and your guests will access the fire pit. Placing it near a patio, deck, or seating area makes it easy to gather around and enjoy. You'll also want to ensure it's visible from various vantage points in your yard for maximum ambiance.Drainage and Airflow
Proper drainage and airflow are crucial for the longevity and performance of your fire pit. Avoid low-lying areas that may collect water, and choose a spot with good air circulation to ensure the fire can breathe and smoke can dissipate easily. Once you've identified the perfect location, it's time to start planning the construction of your DIY fire pit.Designing Your DIY Fire Pit
When it comes to designing your DIY fire pit, the options are endless. From classic circular shapes to unique geometric patterns, the style you choose should reflect your personal preferences and complement the existing landscape of your outdoor space. Here are a few popular design ideas to consider:Traditional Round Fire Pit
The classic round fire pit is a timeless choice that works well in a variety of backyard settings. This simple yet elegant design typically features a circular stone or brick structure with a metal fire ring or grate in the center.Rectangular or Square Fire Pit
For a more modern aesthetic, a rectangular or square fire pit can make a bold statement in your outdoor living area. These designs often incorporate sleek, clean lines and may feature built-in seating or a surrounding patio.Sunken Fire Pit
A sunken fire pit, where the structure is partially or fully recessed into the ground, can create a cozy, intimate gathering space. This design is particularly well-suited for smaller yards, as it doesn't take up as much surface area.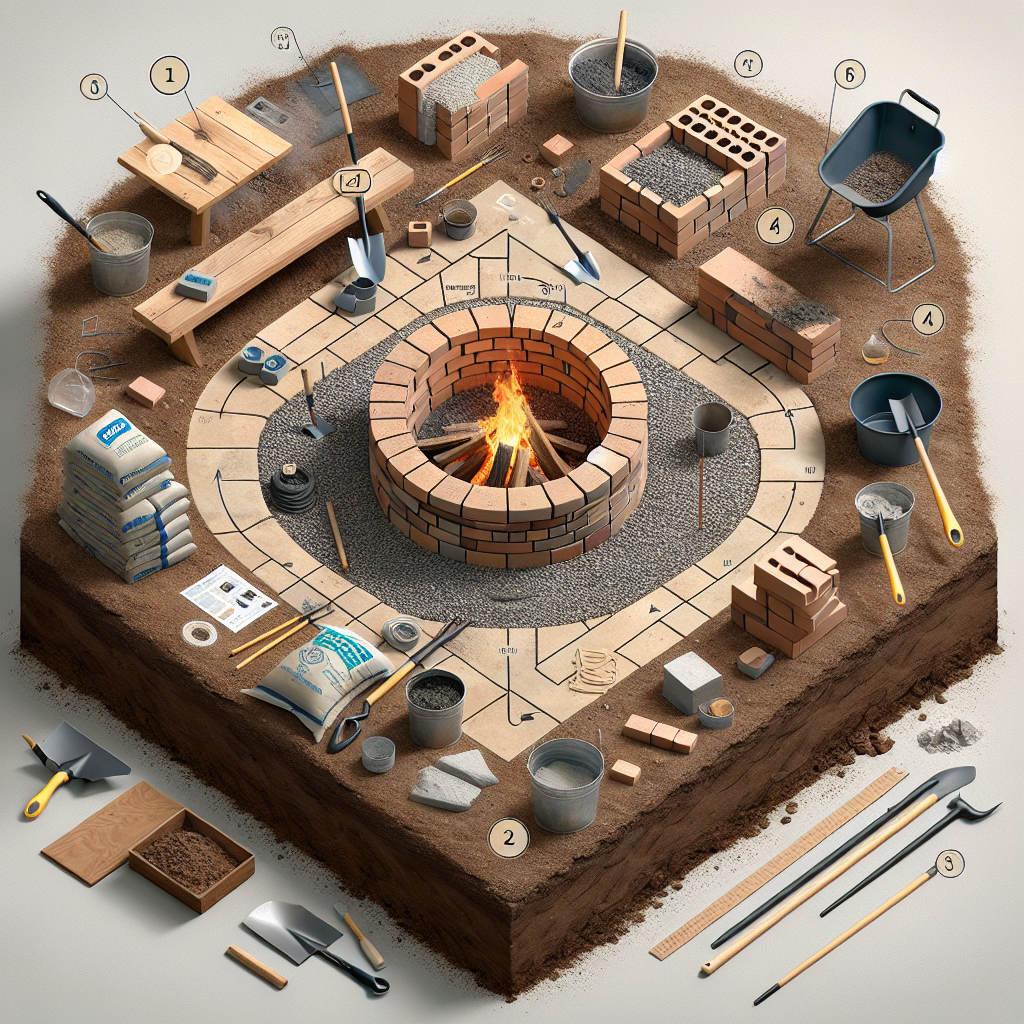
Customized Fire Pit Designs
If you're feeling creative, you can design a one-of-a-kind fire pit that reflects your personal style. Consider incorporating unique materials, shapes, or even built-in features like benches or a cooking grate. Regardless of the design you choose, be sure to factor in the size of your fire pit based on the available space and the number of people you plan to accommodate. As a general rule, a fire pit with a diameter of 36-48 inches is suitable for most backyard settings.Gathering the Necessary Tools and Materials
To build your DIY fire pit, you'll need to assemble the following tools and materials:Tools:
- Shovel or spade
- Wheelbarrow or bucket
- Trowel or masonry float
- Hammer or rubber mallet
- Circular saw or angle grinder (for cutting materials as needed)
- Level
- Measuring tape
- Eye protection and work gloves
Materials:
- Fire-resistant materials (e.g., brick, stone, concrete pavers)
- Mortar or construction adhesive
- Sand or gravel for the base
- Metal fire ring or grate (optional)
- Fireproof liner or bricks (optional)
Step-by-Step Instructions for Building a DIY Fire Pit
Now that you've gathered all the necessary tools and materials, let's dive into the step-by-step process for constructing your DIY fire pit:1. Prepare the Site
Start by clearing the area where you'll be building the fire pit. Remove any grass, weeds, or debris, and level the ground using a shovel or spade. Ensure the surface is flat and compact.2. Create the Base
Spread a 2-4 inch layer of sand or gravel over the prepared site to create a stable, well-draining base for your fire pit. Use a trowel or masonry float to level the surface.3. Lay the Fire Pit Walls
Begin by arranging the first layer of fire-resistant pavers or bricks in your desired shape and size. Use a level to ensure the base is even, and apply a thin layer of mortar or construction adhesive between each piece to secure them in place. Continue building the walls, staggering the joints between each row for added stability. As you progress, periodically check the levelness of the structure and make any necessary adjustments.4. Install the Fire Ring or Grate (Optional)
If you're using a metal fire ring or grate, place it inside the fire pit structure, ensuring it's centered and level. You may need to adjust the height of the walls to accommodate the ring.